Home hardware manufacturer 18+ years

  • Facebook
  • linkedin
  • TikTok
  • youtube
  • Twitter
Leave Your Message

How to Choose the Right Wardrobe Hanging Rod?

Choosing the right Wardrobe Hanging Rod is less simple than it appears. A polished finish may attract attention, but strength, span, and daily use matter more. The rod must support clothing without bending, rattling, or pulling poorly fixed brackets from the wardrobe panels.

David Chen, a wardrobe hardware consultant with more than 18 years of installation experience, says, “A reliable rod begins with the load, not the label.” His advice is practical. Count heavy coats, denim, suits, and seasonal garments before choosing a material or diameter. Measure the internal width carefully, including uneven walls and door clearances. A few millimetres can change the installation.

Steel, stainless steel, aluminium, and reinforced wood each offer different benefits. Steel usually handles demanding loads well. Aluminium feels lighter and resists corrosion. Wood can create warmth, but its finish and internal structure deserve closer inspection. Hollow rods may look strong while failing under concentrated weight. That detail is easy to miss.

Bracket spacing also deserves attention. A long Wardrobe Hanging Rod may need central support, especially in a busy family wardrobe. Installation quality matters just as much as product quality. I once focused too heavily on appearance and underestimated how quickly a crowded rail could sag. That was a useful mistake.

This guide examines rod materials, dimensions, load capacity, bracket design, finish, and installation conditions. It also questions common assumptions. The most expensive option is not automatically the safest. A perfect choice does not exist. The right choice fits the wardrobe, the clothing, and the people using it every day.
How to Choose the Right Wardrobe Hanging Rod?

Assess Your Wardrobe Space and Storage Requirements

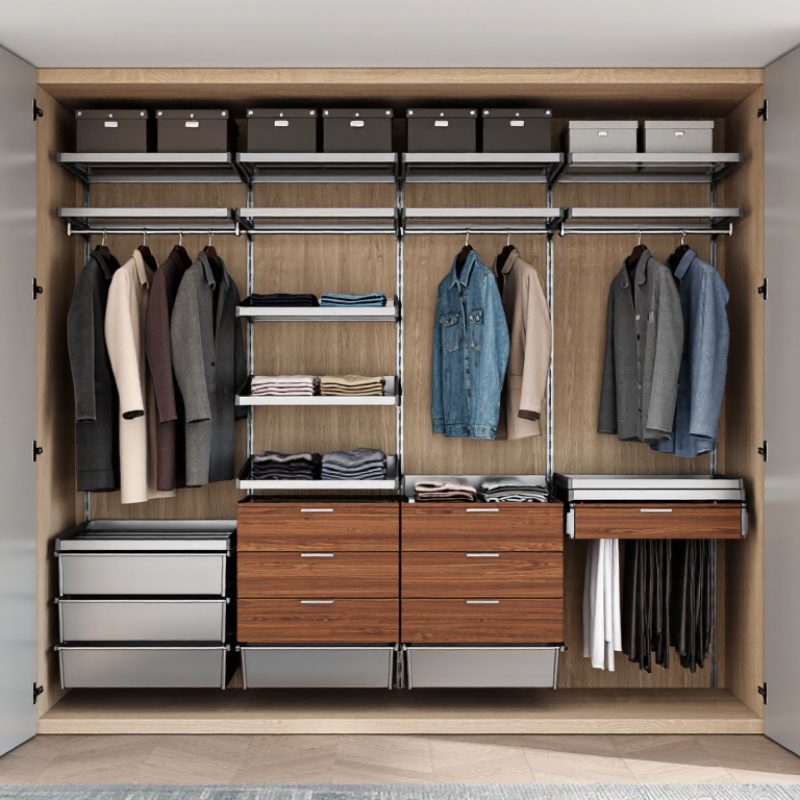
Before choosing a wardrobe hanging rod, measure the usable space carefully. Check the width between side panels, the interior depth, and the vertical clearance above shelves. Measure twice. A rod may fit the opening but still leave too little room for thick coats or sliding doors. Record obstructions, including hinges, drawers, lighting, and uneven walls. These small details often determine whether clothes hang freely or remain compressed.

Consider what the wardrobe must carry throughout the year. Lightweight shirts need less support than winter jackets, suits, or loaded garment bags. Count your current hangers, then allow extra space for future clothing. A crowded rod encourages creasing and makes daily access frustrating. For long garments, measure from the rod position to the floor or lower shelf. Short garments may allow a second rod, but only when both levels leave comfortable hand clearance.

The rod’s length and fixing points should match the storage load. Longer spans usually need stronger support or a central bracket, especially with dense clothing. Confirm that the wardrobe panels can hold the selected hardware. I once measured only the front opening and ignored an internal shelf, which made the planned rod impractical. That mistake was avoidable. Check the wall or panel material, use suitable fasteners, and test the finished rod gently before adding every garment.
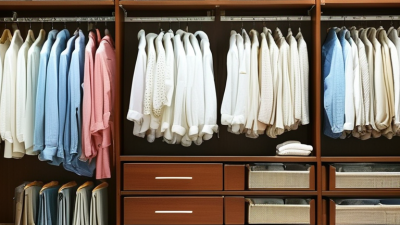
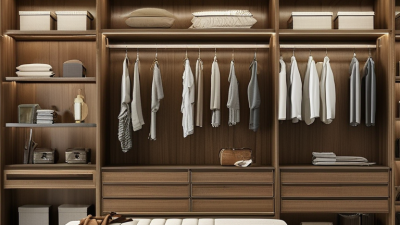
Compare Hanging Rod Materials, Shapes, and Finishes

How to Choose the Right Wardrobe Hanging Rod?

A wardrobe rod must support daily use without bending, staining, or loosening. In my fitting experience, steel handles heavy coats better than thin aluminum. Stainless steel resists moisture, making it useful near bathrooms or humid bedrooms. Solid wood adds warmth, but its natural grain may expand slightly with seasonal humidity. Measure the clear wardrobe width before choosing any material. A rod should sit firmly, without forcing the side panels outward. It sounds simple. It is not always.

Shape also changes performance. Round rods allow smooth hanger movement and reduce pressure on narrow hooks. Oval rods can resist twisting across wider wardrobes, especially when loaded with winter clothing. Square profiles look modern, but their corners may catch delicate fabric. For children's wardrobes, a lower rod can improve access, although installation height should match the child's reach. I once selected a rod mainly for appearance and underestimated its wall anchors. The finish scratched quickly. That mistake still influences my recommendations.

Choose the finish according to use, not only decoration. Chrome reflects light and wipes clean easily, while matte black hides fingerprints but shows pale dust. Brushed metal can disguise small marks from hangers better than glossy surfaces. Powder-coated finishes offer consistent color, yet poor coating may chip around cut edges. Inspect the end caps and mounting brackets carefully. Weak fittings can fail before the rod does. A small test load helps, but it cannot replace checking the wall material and screw type.

How to Choose the Right Wardrobe Hanging Rod?

Compare hanging rod materials, shapes, and finishes by balancing strength, weight, corrosion resistance, and everyday usability.

Materials

Steel offers high stiffness and value. Aluminum is much lighter but usually needs a larger section or additional support. Stainless steel provides strong corrosion resistance for humid spaces. Hardwood gives a warm appearance but varies more naturally in strength and dimensions.

Shapes

Round rods are easy to install and rotate hangers smoothly. Oval rods can provide more resistance to twisting and may offer a flatter profile. Hollow sections reduce weight, while thicker walls and shorter spans reduce bending.

Finishes

Powder coating creates a durable decorative layer. Chrome plating provides a hard, reflective surface when properly applied. Brushed stainless steel hides fingerprints better than polished surfaces. Painted finishes should be protected from scratches and moisture.

Material values are typical engineering reference ranges: yield strength for metals and flexural strength for hardwood. Actual wardrobe-rod capacity depends on diameter, wall thickness, span, support spacing, fixing method, and load distribution.

Choose the Right Rod Length and Weight Capacity

How to Choose the Right Wardrobe Hanging Rod?

Choose the Right Rod Length and Weight Capacity

A wardrobe rod should fit the opening without pressing tightly against both sides. Measure the interior width at the top, middle, and bottom. Older cabinets may not be perfectly square. Use the smallest measurement for safer installation. Leave a little clearance for brackets and smooth hanger movement. A rod that is too long can bend or force the cabinet walls outward. I once trusted a single measurement and had to reposition the supports. It was a small mistake, but an avoidable one.

Weight capacity matters as much as length. Light shirts need less support than coats, denim, or formal clothing. Estimate the total load, then choose a rod rated above that number. For example, ten heavy coats can create serious pressure across a long span. Longer rods usually need a center support to reduce sagging. Check the wall material before selecting screws and anchors. A strong rod can still fail when its mounting points are weak.

Tips: Measure twice, and record the smallest width. Add a center bracket when the span feels flexible. Test the installed rod with a few garments before filling it completely. Keep heavier items near the supports. Do not rely only on appearance; slight bending often appears before failure. If the load is uncertain, choose a stronger rod and reduce the span.

Select the Best Installation Method and Support Hardware

How to Choose the Right Wardrobe Hanging Rod?

Select the Best Installation Method and Support Hardware

A wardrobe rod needs more than a suitable length. Its installation method must match the wall, cabinet material, and expected clothing weight. Measure the clear opening twice, then check whether doors or drawers need extra space. A rod that fits perfectly on paper may still rub during daily use.

For solid wood or a reinforced cabinet panel, use sturdy screws with appropriately sized washers. Particleboard requires more care. Choose wider support plates or install a reinforcement strip behind the panel. For drywall, avoid relying on surface screws alone. Use rated hollow-wall anchors, or fix the bracket into a stud whenever possible. Masonry walls need suitable plugs and screws designed for brick or concrete.

Support spacing matters. Long rods can bend in the middle, especially with coats, denim, or damp garments. Add a center bracket when the span approaches the hardware’s recommended limit. Keep the rod level, using a spirit level before tightening every screw. I once focused too much on rod length and overlooked bracket depth. The result was a cramped closet. It worked, but not well.

Check the hardware load rating, not just the rod diameter. Tighten fasteners firmly, without crushing cabinet panels. After installation, apply weight gradually and inspect movement. A small adjustment now prevents a damaged panel later.

Check Accessibility, Durability, and Long-Term Maintenance

How to Choose the Right Wardrobe Hanging Rod?

Accessibility should guide the rod’s position before appearance. Measure from the floor, shelves, and wardrobe doors. Leave enough clearance for hangers to move without scraping nearby surfaces. A reachable height helps children, older adults, and anyone with limited mobility. Pull-out rods can improve access in deep wardrobes. However, they may need stronger side supports. Test the rod with a loaded hanger before final installation. It is easy to overlook daily reach.

Durability depends on more than the rod’s visible material. Check its diameter, wall thickness, support spacing, and stated load capacity. A long rod with weak brackets may bend in the middle. Steel usually handles repeated loading well, while treated aluminum can reduce weight. Wood can work, but moisture and poor sealing may cause swelling. I once chose a thick-looking rod that still sagged because its central support was missing. That mistake changed how I assess wardrobe hardware.

Long-term maintenance should remain simple. Inspect screws and brackets every few months, especially after moving the wardrobe. Tighten loose fixings carefully, but avoid stripping the holes. Wipe dust with a soft, slightly damp cloth. Dry the surface afterward. Do not use harsh cleaners unless the material allows them. Watch for rust, peeling finishes, sharp edges, or unusual movement. These small warnings often appear before serious failure. Replacement parts should also be easy to find. A slightly less decorative rod may prove more practical over time.

How to Choose the Right Wardrobe Hanging Rod? - Check Accessibility, Durability, and Long-Term Maintenance

Evaluation Area What to Check Practical Recommendation Typical Data or Measurement Why It Matters
Accessibility Clearance below the rod Leave enough space for hangers and garments to move freely without rubbing against the shelf or floor. Allow approximately 5–8 cm (2–3 in) above the hanger hook and at least 5 cm (2 in) between the garment hem and the surface below. Improves visibility and reduces snagging, creasing, and difficult access.
Accessibility Rod height Position the rod according to the user’s reach and the wardrobe layout. Consider a pull-down or lower rod where reach is limited. A commonly comfortable standing reach zone is about 120–150 cm (47–59 in) from the floor, depending on the user. Reduces overhead stretching and makes everyday clothing easier to retrieve.
Accessibility Rod depth from the front edge Keep the rod close enough to the opening for easy reach while maintaining clearance from doors and hinges. A typical wardrobe rod is installed approximately 23–28 cm (9–11 in) from the back panel, subject to door and hanger clearance. Prevents garments from being pushed too far back and improves use of the available depth.
Capacity Rod diameter and hanger compatibility Choose a rod that fits the supports and allows hangers to slide without catching. Common rod diameters are approximately 25–32 mm (1–1.25 in). Confirm the actual internal diameter of each support. A suitable diameter balances smooth movement, stiffness, and secure support.
Durability Material and corrosion resistance Use coated or plated metal in humid rooms; use sealed solid wood where a warmer appearance is preferred. Metal rods should have an intact, continuous finish with no exposed rust-prone areas. Wood should be sealed on all exposed surfaces. Moisture and damaged finishes can lead to corrosion, staining, swelling, or surface failure.
Durability Span between supports Add a center support on long rods or when storing heavy garments. For many household installations, a support spacing of about 75–90 cm (30–36 in) helps limit visible sag; follow the rod system’s load instructions. Shorter unsupported spans reduce bending and improve long-term stability.
Durability Fasteners and mounting surface Attach supports to solid wood, structural framing, or suitable wall anchors rather than relying only on thin panels. Use fasteners appropriate to the substrate; the combined rated capacity of the supports should exceed the intended load. The mounting system usually determines safety more than the rod alone.
Load Planning Expected clothing weight Estimate the real load, including hangers, before selecting the rod and supports. Approximate garment weights: shirt 0.2–0.4 kg, trousers 0.4–0.8 kg, jacket 0.8–1.5 kg, winter coat 1.5–3 kg. Prevents overloading caused by planning only for the number of garments rather than their weight.
Long-Term Maintenance Cleaning method Wipe the rod with a soft, slightly damp cloth and dry it afterward. Clean every 1–3 months, or more often in dusty or humid environments. Avoid abrasive pads and harsh solvents. Removes dust and residue without damaging protective coatings or finishes.
Long-Term Maintenance Inspection for sagging and loose hardware Check the rod, sockets, brackets, and screws whenever the wardrobe is reorganized. Inspect at least twice a year and immediately reduce the load if the rod visibly bends, shifts, or produces cracking sounds. Early correction helps prevent sudden detachment and damage to garments or cabinetry.
Long-Term Maintenance Surface condition Replace or refinish components with peeling, sharp, heavily scratched, or corroded surfaces. Repair minor finish damage promptly; do not continue using a rod with sharp edges or structural cracks. Protects clothing and reduces the risk of cuts, snags, and progressive material failure.
Best Overall Choice Balance of accessibility, strength, and upkeep Select a rod with a smooth, corrosion-resistant finish, correctly spaced supports, accessible placement, and a clearly stated load rating. Prioritize fit, substrate-compatible installation, adequate clearance, and a load capacity above the calculated everyday load. A well-fitted system is safer, easier to use, and less expensive to maintain over time.

Note: Dimensions and load guidance are general planning values. Always follow the installation instructions and rated capacity supplied with the selected rod and mounting hardware.